What are Period Settings?
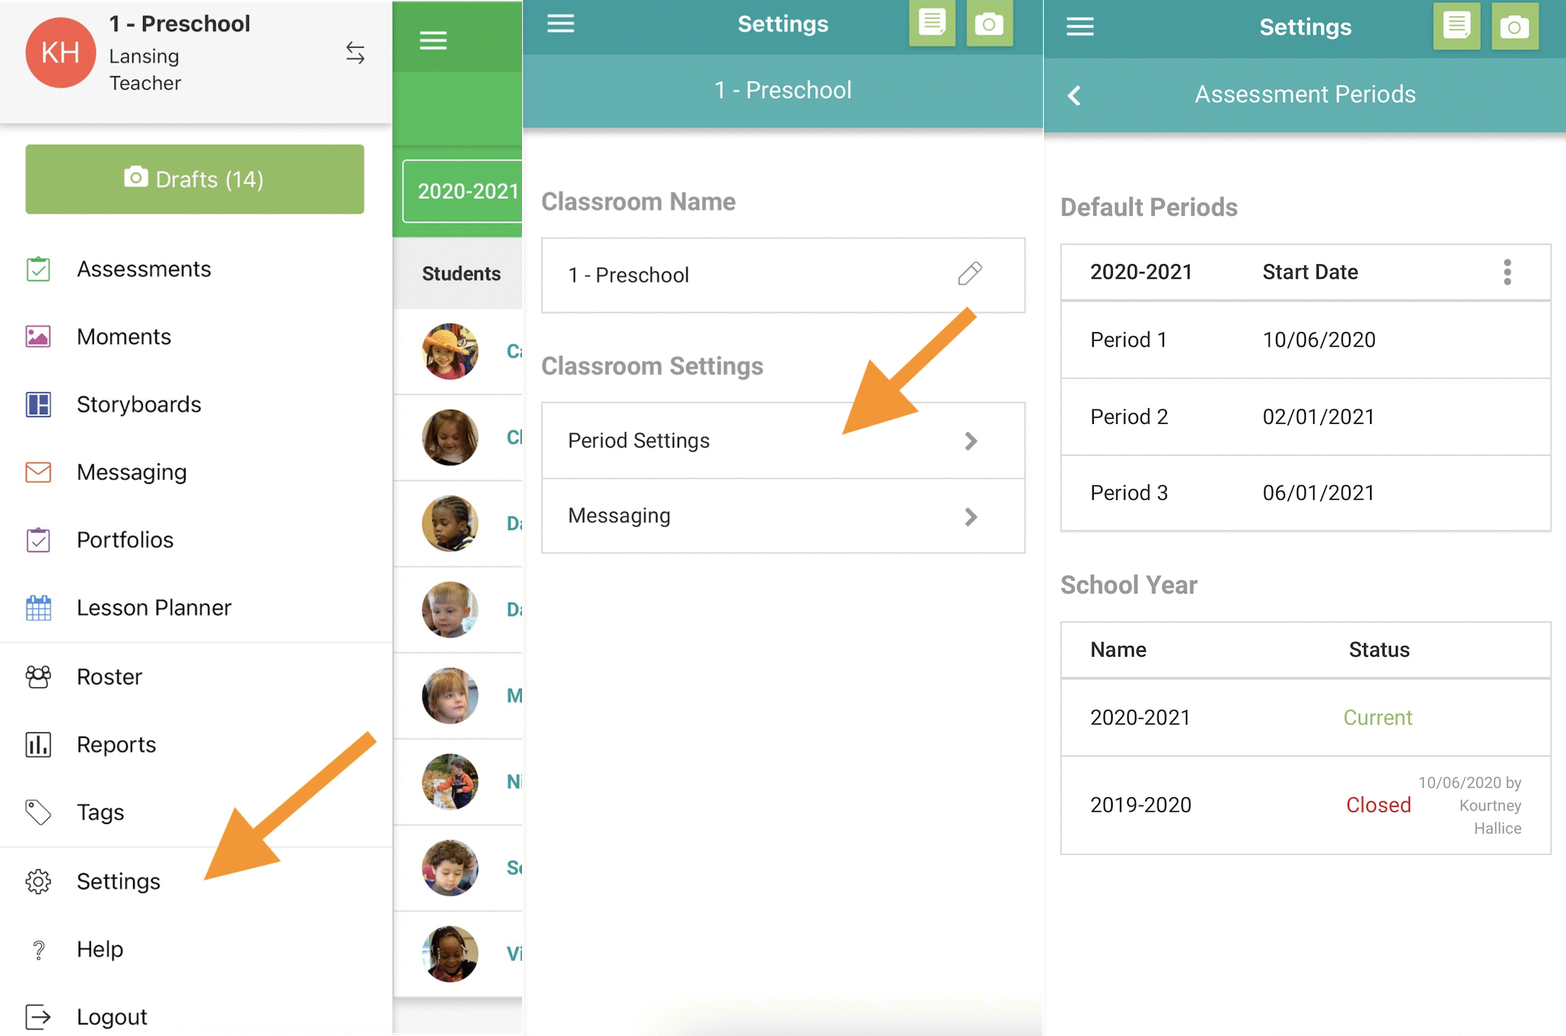
Period Settings are available for users with the COR Advantage assessment. Any user can see the dates of their assessment periods for their account by going to Settings and selecting Period Settings. Although any user can see their periods, not all users can edit them due to user levels and account setup. Through the Period Settings, Administrators are able to add assessment periods into their accounts by adding the dates and selecting their customization preferences. The dates that have been selected will keep your data organized!
Table of Contents
Accessing Period Settings
Users with COR Advantage can access Period Settings from the app on their device or from the website by going to Menu > Settings > Period Settings. Please note access to Period Settings depends on your account structure and your user level.

Customization
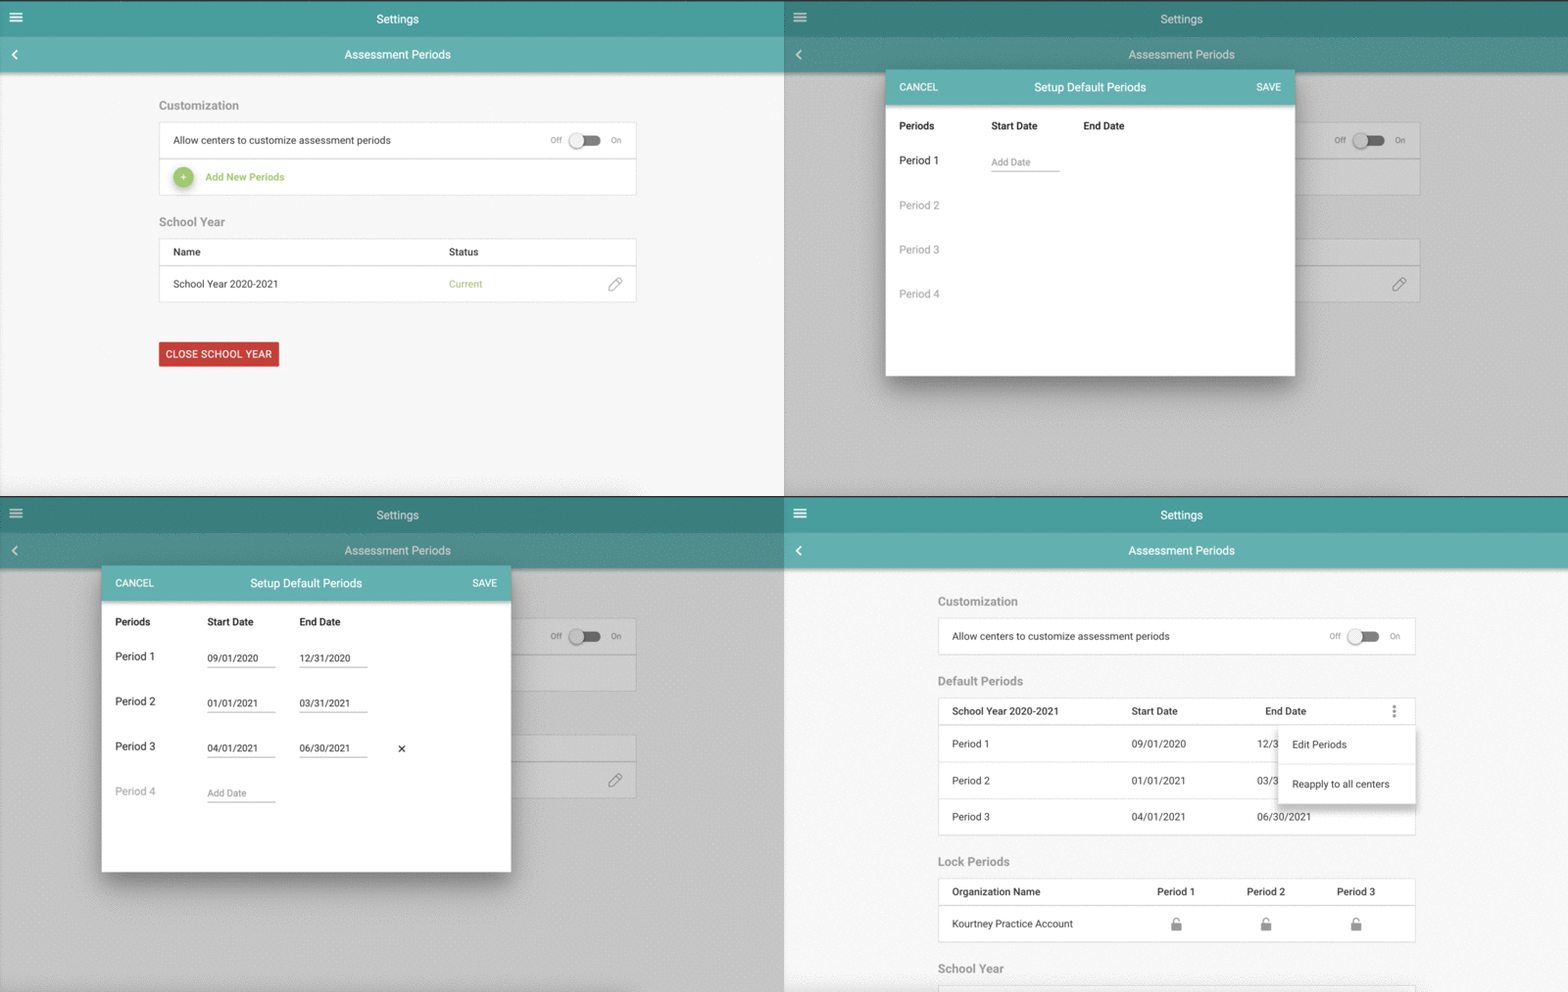
With this setting, you can configure whether or not you would like to allow users with lower access than you to further customize the assessment periods. For example, if you are a Director, you could decide if Teachers should be able to customize their assessment periods. If everyone within your program uses the same assessment periods, you'll want to slide the customization toggle OFF. If the customization is off, once you add the default assessment periods, they will automatically be applied to all of the entities that you have access to! If classrooms or centers within your program use different assessment periods, it's important to leave the customization toggle turned ON. You can still set default assessment periods but still allow other uses to be able to edit them to fit their needs.
Add New Periods
You can set new periods for your program by clicking the green "Add New Periods" button and selecting the date ranges that align with your assessment periods. There are no requirements for the number of periods or days within a period, although we typically see programs setting 3-4 periods per academic year. Once your initial assessment periods have been set, you can click the three dots to the right of End Date to edit the dates or reapply any changes to all entities.

Lock Periods
Once your program finishes an assessment period, your administrator should lock it. Locking a period ensures the data is preserved and won't be adjusted. You can learn more about locking your assessment periods here.
Once a period is locked, data within the date range of the locked period cannot be edited or deleted and any new content cannot be published or added within those date ranges. For example, observations in your Moments page will no longer be editable anymore, since the observations in the Moments page are what the Assessment Dashboard references to pull in data.
School Year
Your school year will automatically be created for you but will need to be renamed based on your current academic year. You can rename it by clicking the pencil icon and typing in the appropriate name. Please note that the school year name will appear on all reports. Under School Year, you will also see the names of any previously closed school years, as well as the dates they were closed. You can learn more about this and closing your school year here.
Comments
0 comments
Please sign in to leave a comment.