What is Period Locking?
Period locking is a feature in your COR Advantage Period Settings that allows you to “lock” the data of your periods. Once a period is locked, data within the date range of the locked period cannot be edited or deleted and any new content cannot be published or added within those date ranges. Once your teachers complete their assessments for a given period, you will want to lock the period to preserve the data and prevent it from being edited moving forward.
Table of Contents
- Accessing Period Settings
- Why Should You Lock Your Period
- Before You Lock Your Period
- How to Lock a Period
- How Does Locking Your Period Impact Your Account
- Unlock a Period
- Video Tutorial for Locking Periods
Accessing Period Settings
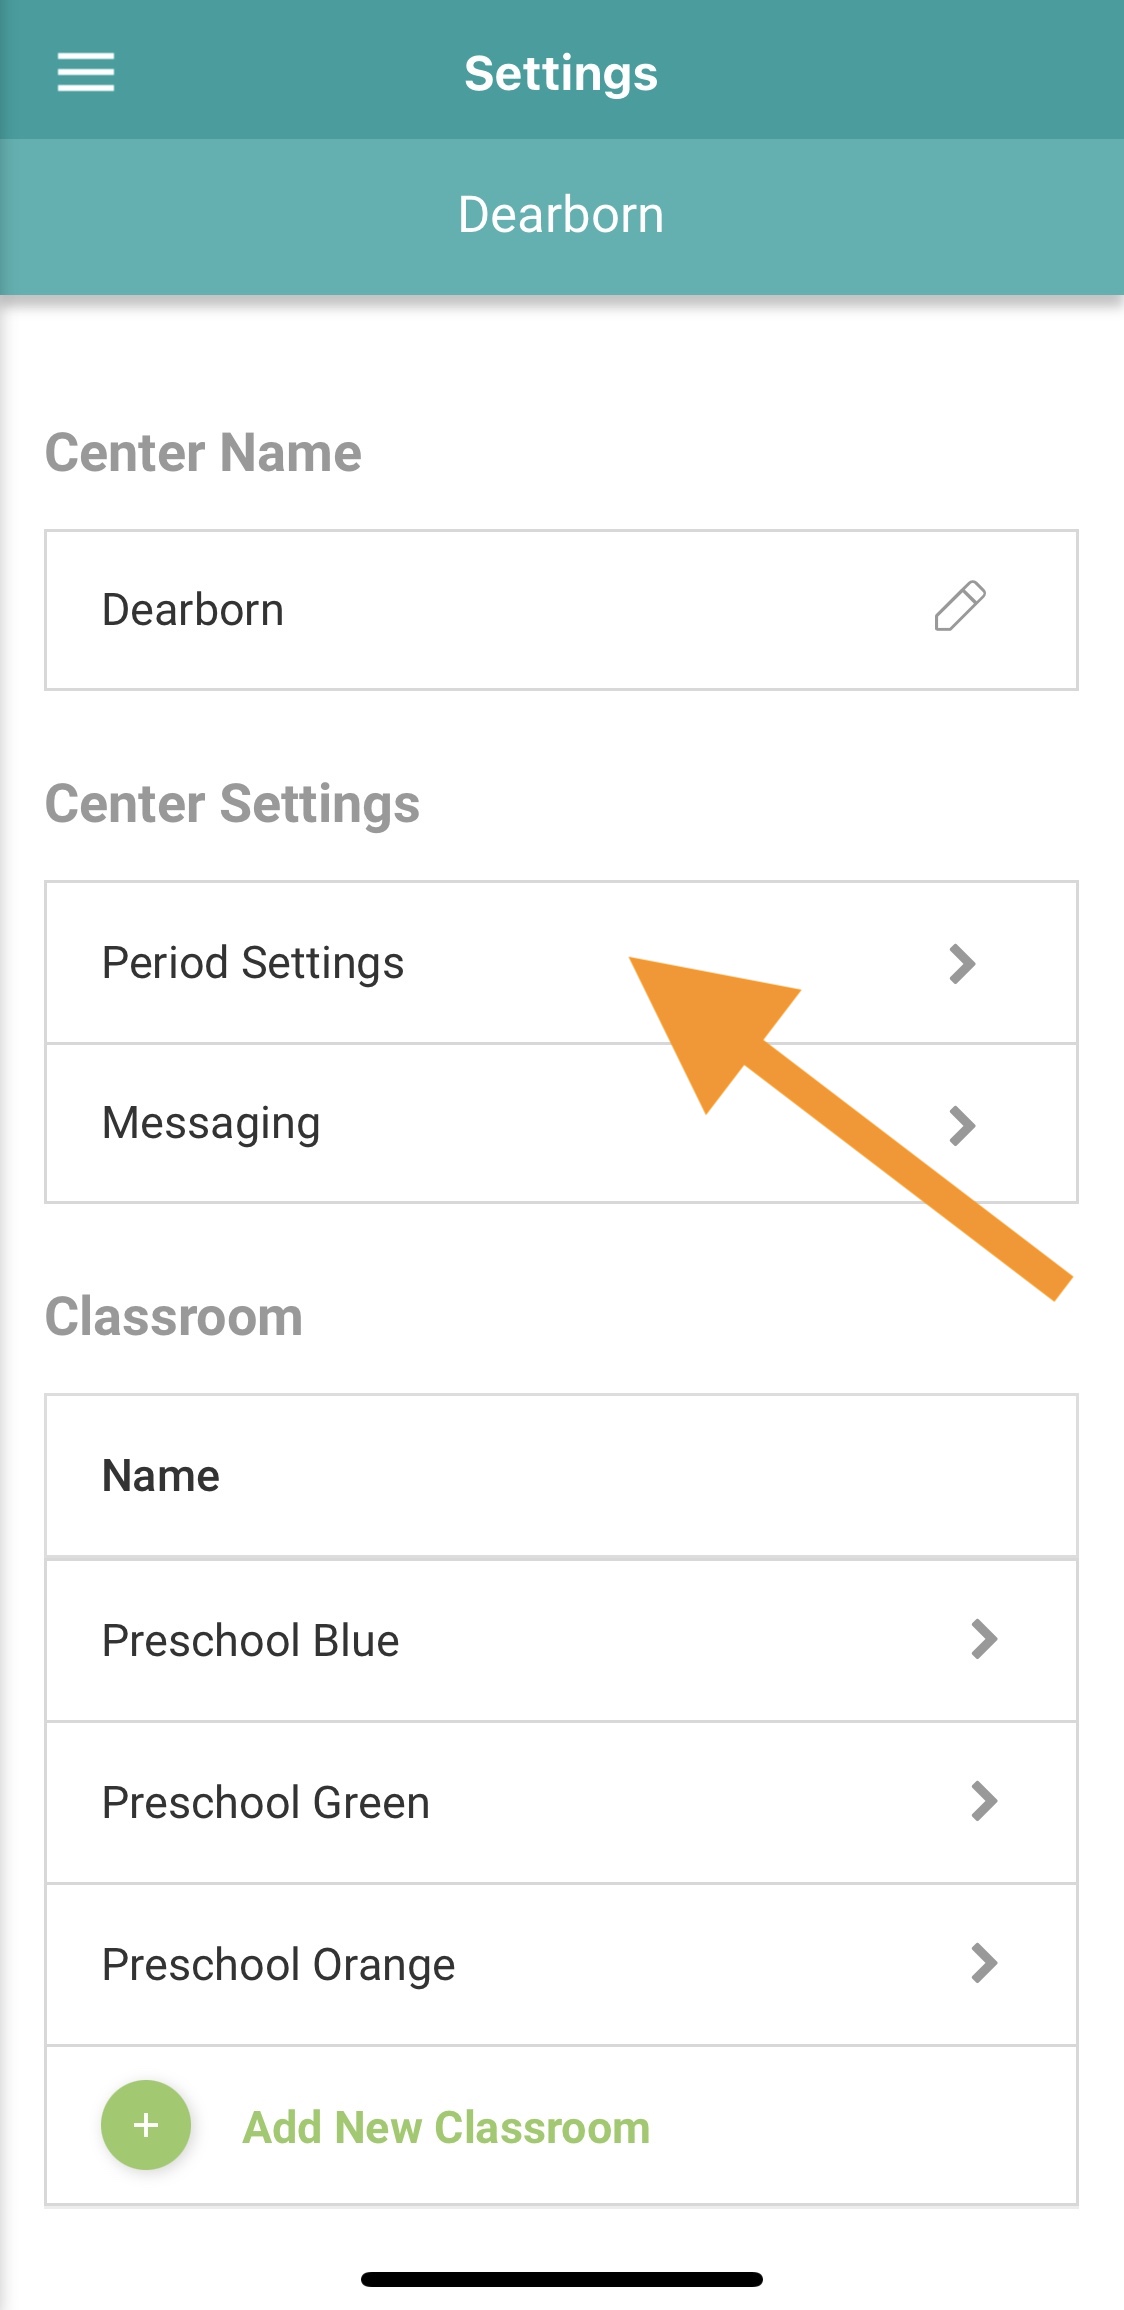
Users with COR Advantage can access Period Settings from the app on their device or from the website by going to Menu > Settings > Period Settings. Please note access to Period Settings depends on your account structure and your user level.

Why Should You Lock Your Period
While you are not required to lock an assessment period, it is a best practice. Period locking is designed to protect your data from any changes in the account, so if you will have any students move classrooms or join or leave over the course of a year, period locking will ensure an accurate picture of your data is collected.
For example, if Damian, a new student, joined your program during Period 2, he would not have any data from Period 1 because he did not exist in your account during that window of time. If Period 1 has not been locked, Damian and his lack of data in Period 1 would actually affect your Period 1 completion rate. Thus, locking your period is like closing a gate to prevent unnecessary data from affecting your past data. If you lock Period 1 and then Damian joins, Damian will be there for Period 2, but Damian’s lack of data in Period 1 will not affect your past data.
Before You Lock Your Period
It is best practice to lock the assessment period once it ends. Before you lock the period, follow the steps below to ensure your period is ready to be locked:
- Make sure the data is complete. Verify that teachers have added all their observations for this period and that your completion rates are accurate.
- Download key reports. It is important to download all of the key reports you use to have a complete record available.
- Confirm Rosters are accurate. The Kaymbu platform is dynamic and will include the assessment data for all children that are active on the Roster so if there are students who should not be included in the period you are locking, please make sure their profiles are in the archive.
How to Lock a Period
Once you have downloaded and saved all of your reports, navigate to Menu > Settings > Period Settings where you will find your assessment periods, and below that, the locking fields. You have control over your own entity’s period locking ability. For example, if you are an Administrator, you can lock the period for your organization and thereby all the centers within it. If you are a Director, you can lock the period of all the classrooms you have access to. If you have access to multiple entities, such as multiple centers or classrooms, for example, you can lock specific ones. In Menu > Settings, choose the specific entity you would like to lock from the list at the bottom of the page.
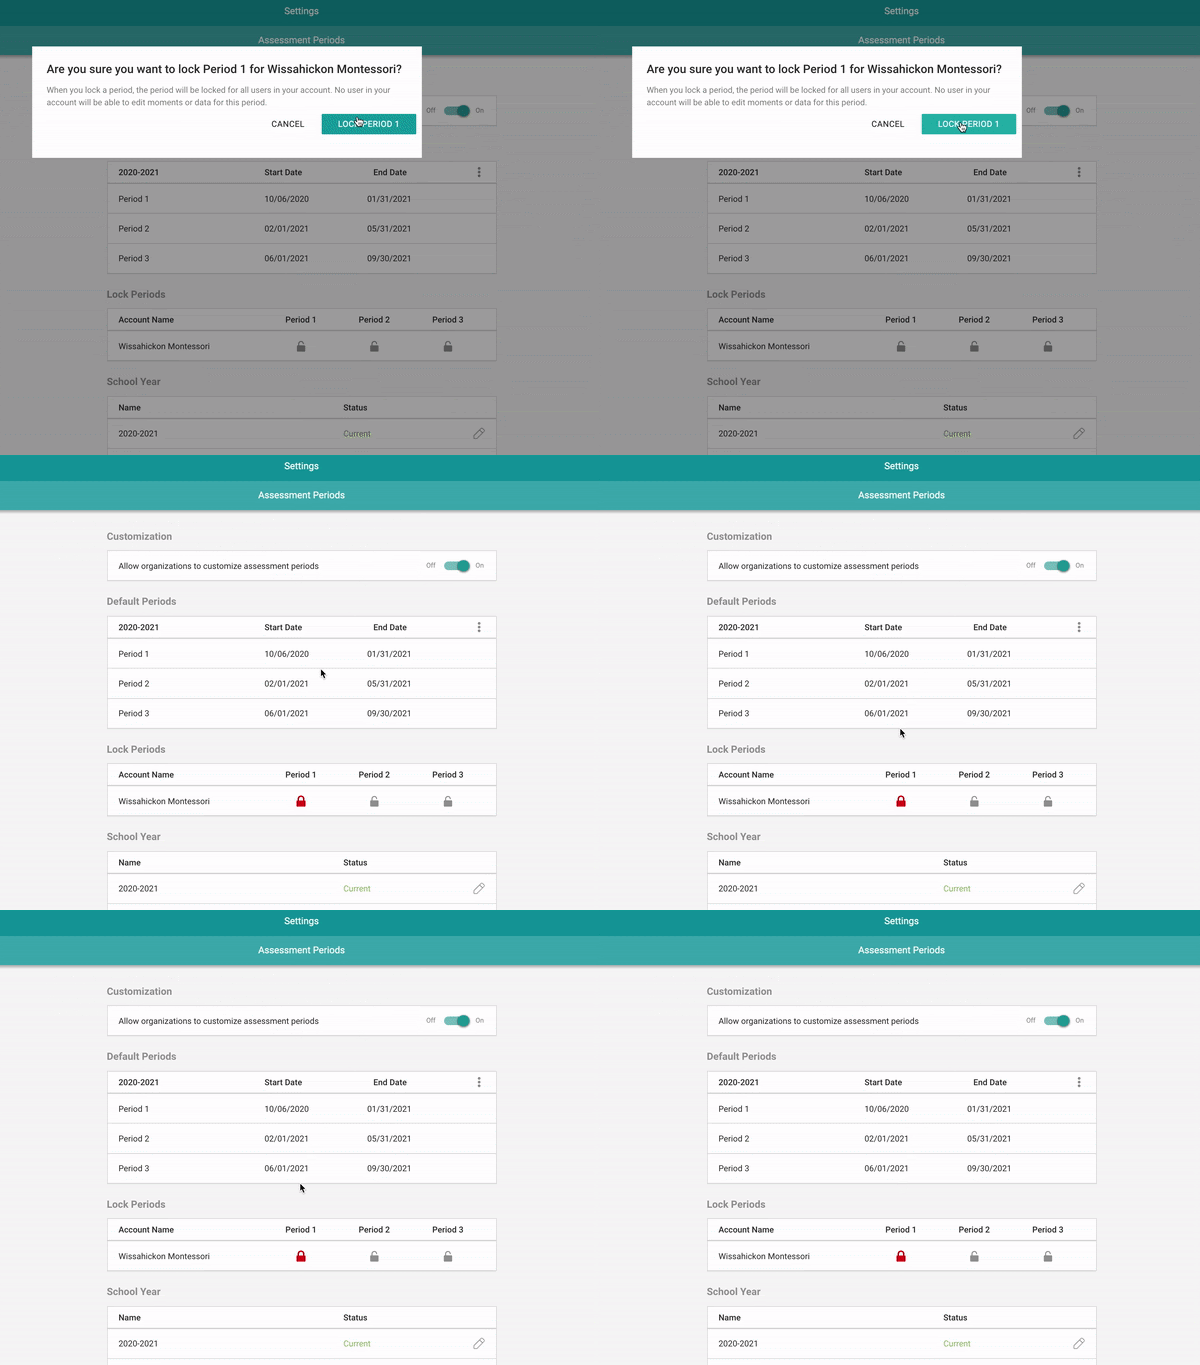
In order to lock a period, simply click the gray unlocked icon. The system will ask if you would like to lock the period. Once confirmed, the lock icon will turn red, indicating that the period has successfully been locked!

How Does Locking Your Period Impact Your Account
Period locking is designed to affect your Moments as those are the observations that power the Assessment Dashboard and Reports. Therefore, when a period is locked, the Moments that are associated with that period (i.e. dated within the period dates), will also be locked. Teachers and Administrators will still be able to see and open the Moments, either via the Moments page or Assessment Dashboard, but will not be able to edit them or make any changes to them. However, they will still be able to print the observation, download it, or resend it to families. Please note that only Moments in the locked period will be affected and users can continue to edit and add Moments in the current, unlocked period.
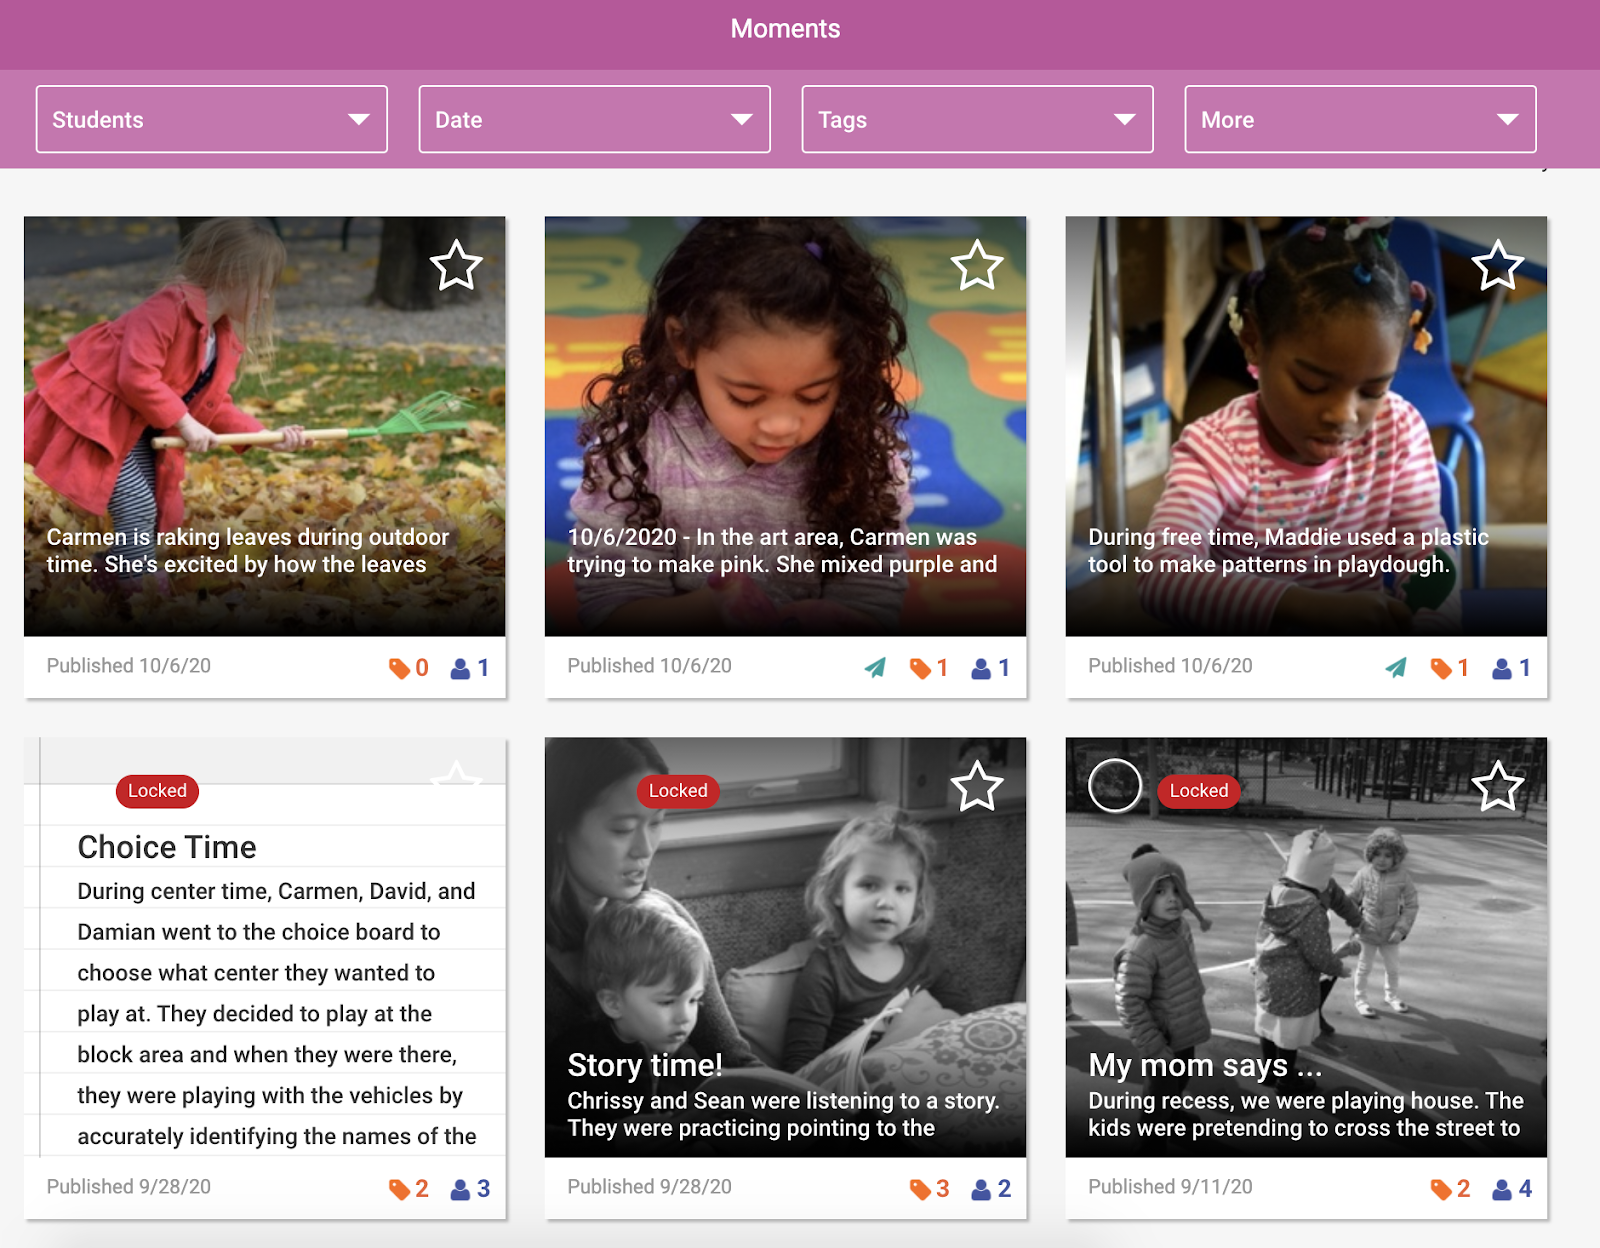
Below is a picture of the Moments page, with some Moments in a locked period and some outside of a locked period. You can see the first row of Moments are in a current, unlocked period, while the second row of Moments (anecdotes and photos) are greyed-out and have the locked icon above them. A user would be able to open any of the greyed-out Moments, and download the documentation, but cannot edit it or make changes.

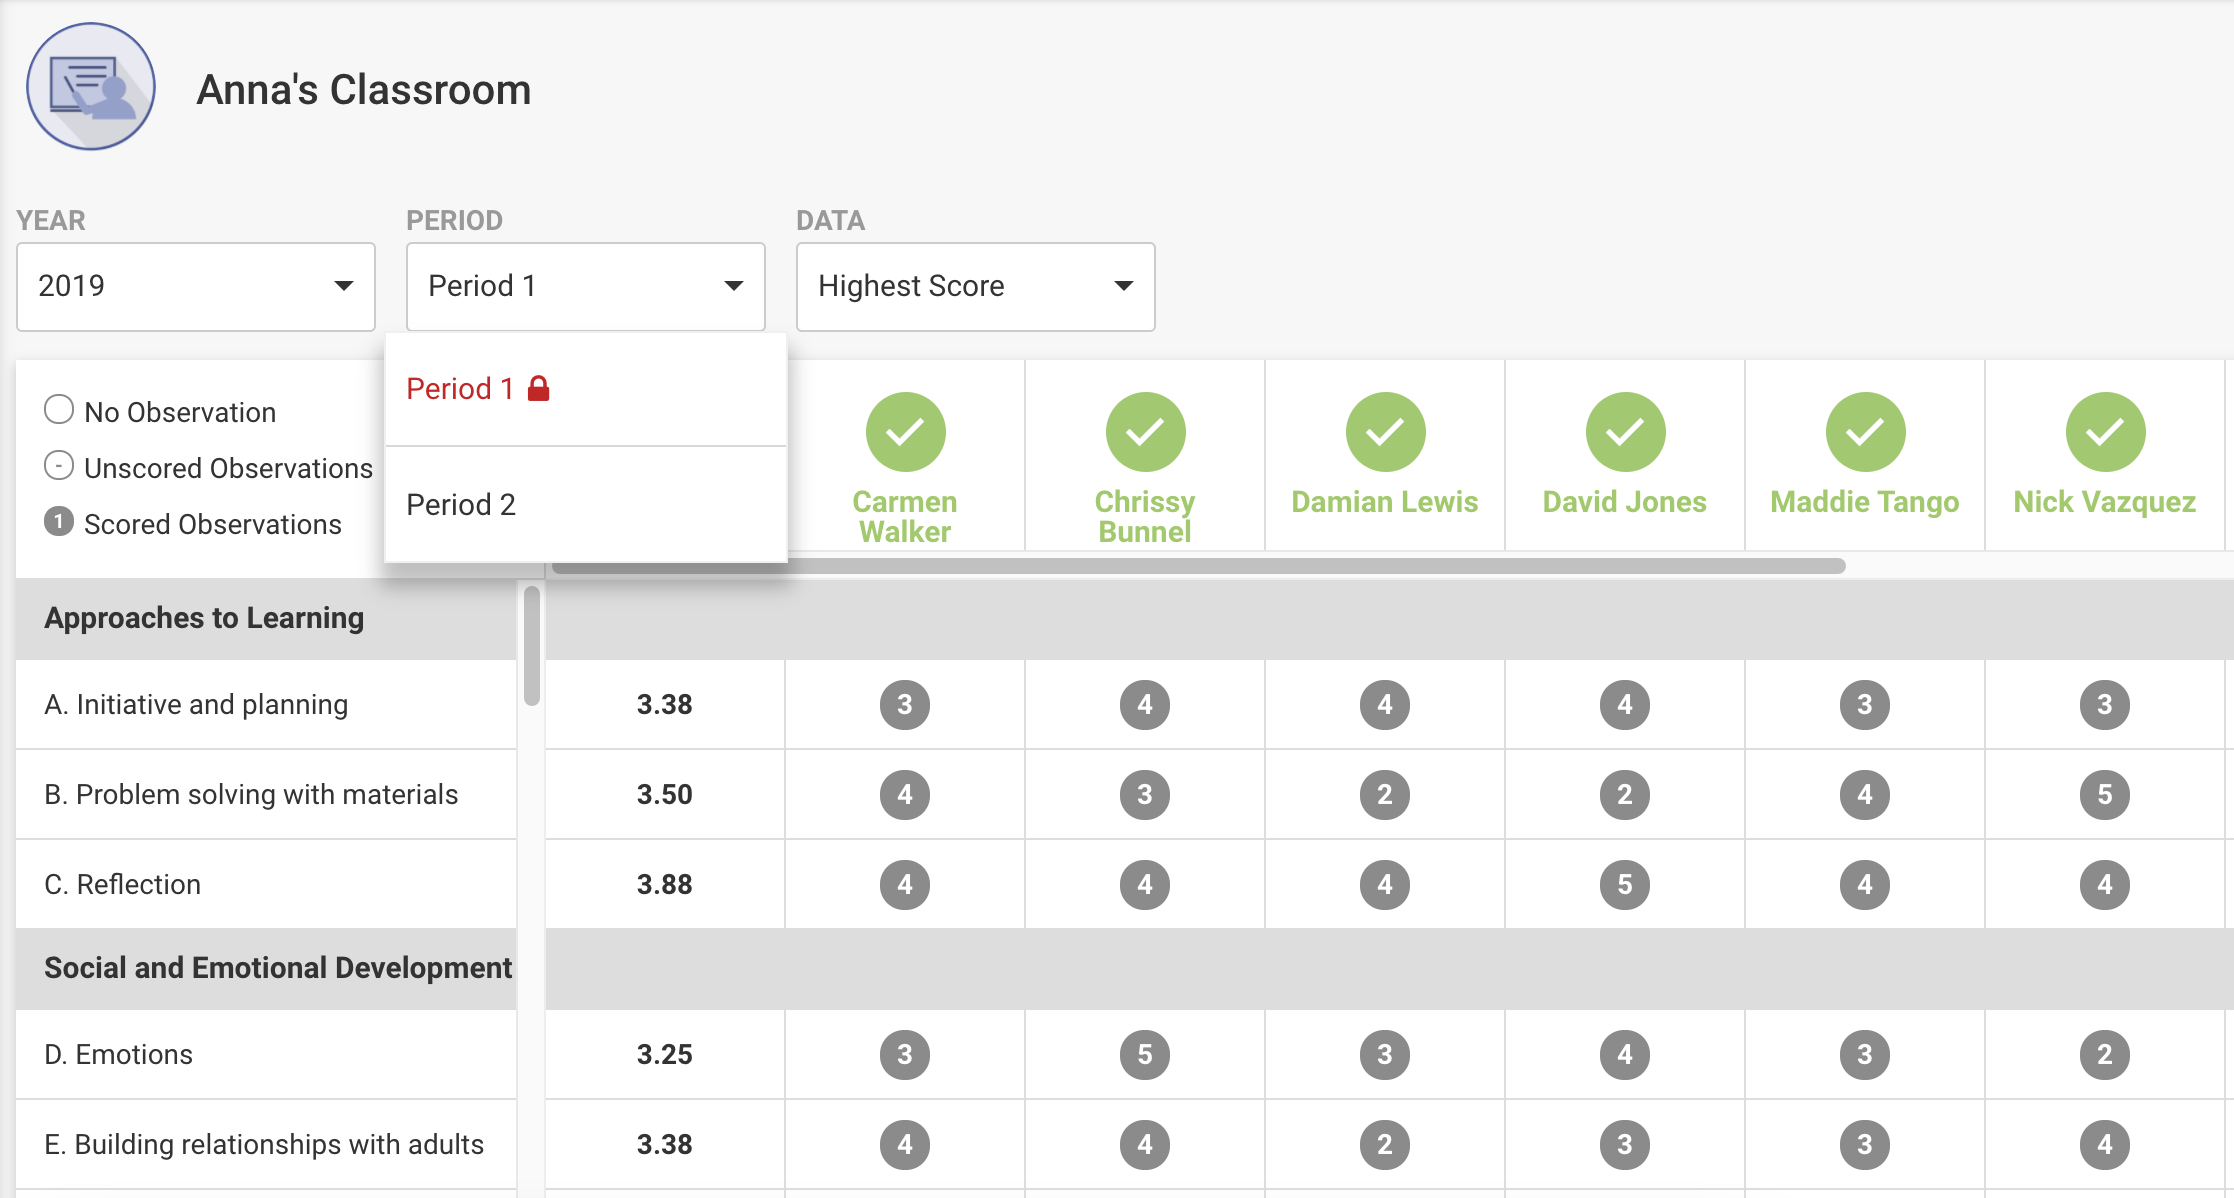
Similarly, the Assessment Dashboard for a locked period will still be accessible. From the Assessment Dashboard, you will find the locked periods indicated by a red lock icon in the Period Drop Down Menu, and the scores across the Dashboard will be grayed-out. However, a user can still access a child’s assessment, by clicking on the child's name. Their assessment from the locked period will appear as grey and the lock icon will emphasize that the period is locked. A user can see the summary and scores, and click into the different categories and items, however, it is not possible to edit the comments or scores of a locked assessment.

Please note, period locking is very much designed to protect your data, so it will only affect parts of the system that are built on the scored Moments. Other components of the online system, such as the Lesson Planner, Storyboards, Messages, and the Roster will not be affected if a period is locked. You can continue to add and edit Storyboards (regardless of when they were created or shared) and send Messages.
Unlock a Period
You can unlock a period if you need to, but once you do this your data will be editable again, so you should avoid unlocking periods unless absolutely necessary. To unlock a period, follow the same set of directions for locking a period, but click on the lock icon again. This will allow you to open the period again. If you have any questions about what will happen when you unlock a period, please reach out to us at help@kaymbu.com.
Video Tutorial for Locking Periods
Below you can find a technical tutorial that will walk you through locking your period!
Comments
0 comments
Please sign in to leave a comment.