What are the best practices for scoring observations?
When scoring observations, there are a few options to help you complete your COR Advantage assessment and save you time! These best practices include adding multiple tags and/or multiple students to one observation. The COR Advantage assessment requires each student on your active roster to have at least one scored observation in each item during your period. For example, when you include more than one student on the observation, that single observation will count for both students in your completion percentage!
Table of Contents
Adding Multiple Tags to One Observation
As you are capturing observations of the students in your classroom, it is very possible that one observation could cover more than one of the COR Advantage assessment items. For example, during a small group time, Kurt was making a pattern with connecting fish and when he was done, he counted all the fish. This observation captures two COR Advantage items, S. Numbers and Counting and V. Patterns.
In the app, on the web, and through the Assessment Dashboard, you can add multiple items to a single observation. Once you have selected one tag, simply select the back arrow to go back to the COR Advantage folders to add more tags!
Adding Multiple Students to One Observation
In addition to adding multiple items to one observation, you can also tag multiple students! Additionally, once you have selected more than one student, you will be able to select a different indicator or score and write a different caption for each student. To do so, simply select as many students as applicable when publishing Drafts to the Moments page.
Applying Different Scores to Each Student
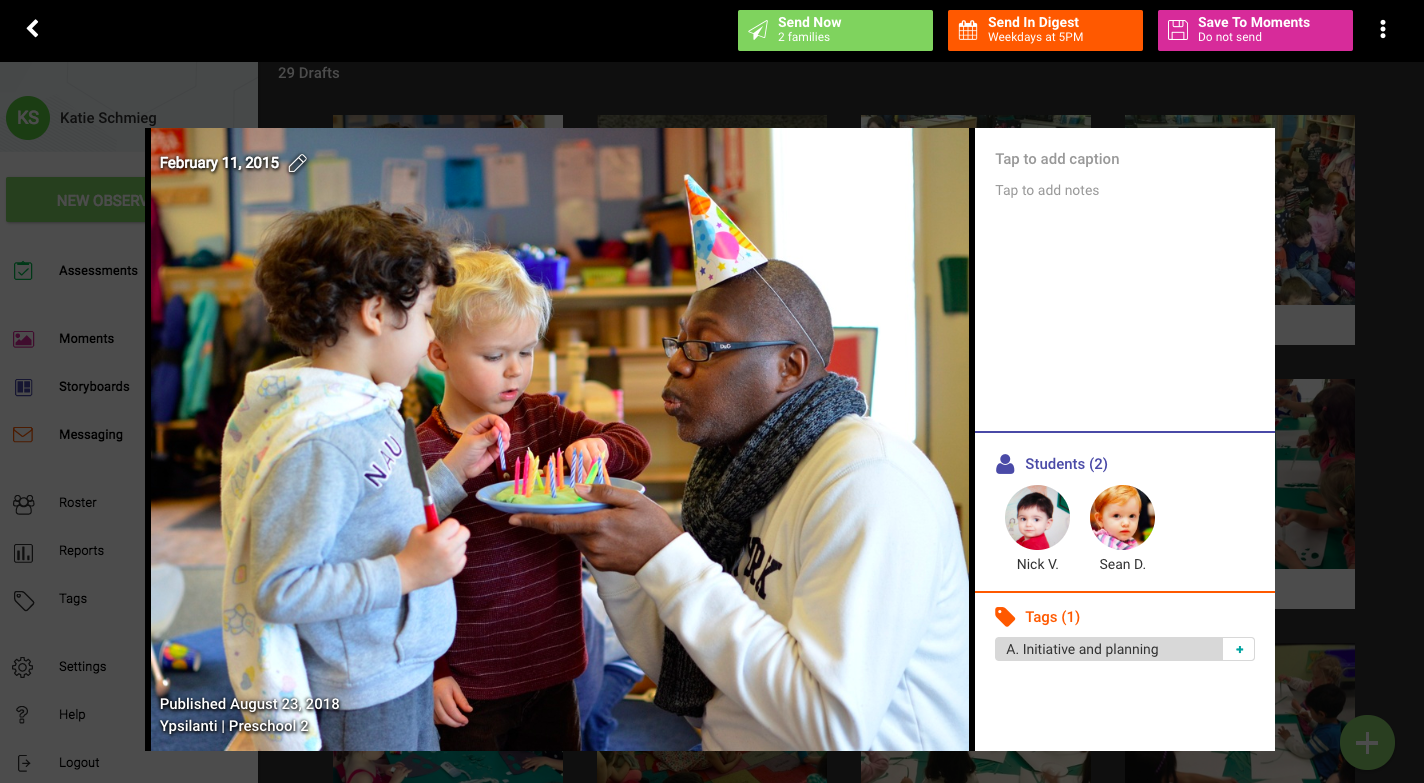
Once you have tagged all of the applicable students, you can also assign each student their own individual score. For example, in the photo below, we have two students, Nick and Sean and we want to tag item A. Initiative and Planning to both students and assign each of them a different score. When you create the observation in either the web portal or the app, select both students, add the appropriate items or tags but do not yet add an indicator or a score yet. You will know the item is unscored by the "+" icon next to the included tag.

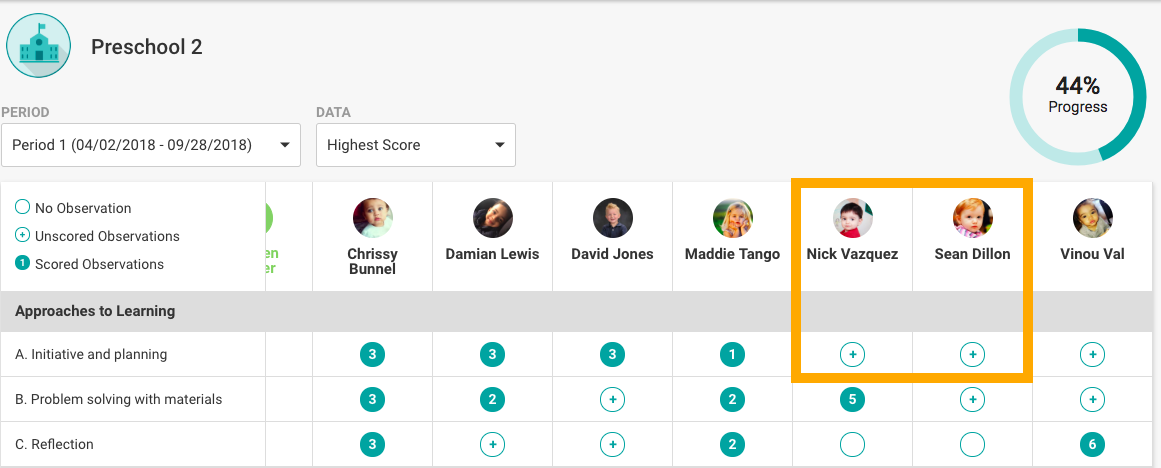
Once you have published the Draft, the unscored observation will appear in your Dashboard for each student for that item.

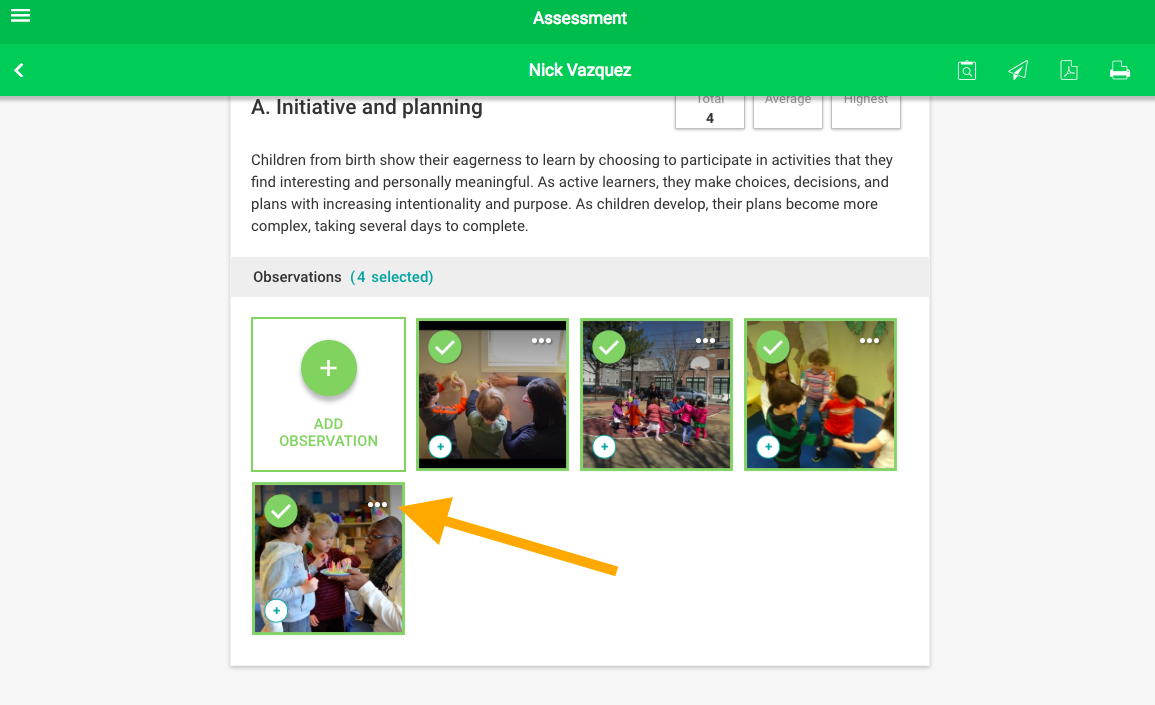
Click on the circle for Nick to pull up that item on his assessment > click on the three dots to pull up the observation > select the item in the Tags section to add an indicator.

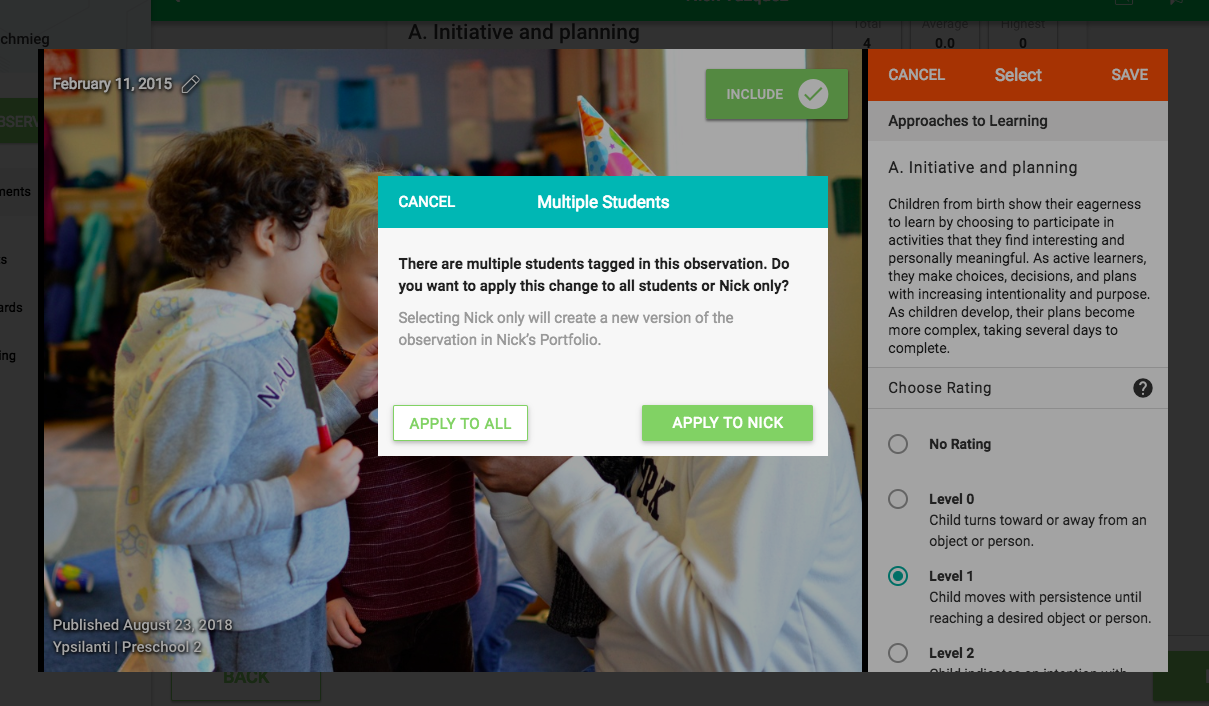
Once you have selected the appropriate indicator or score, a window will pop up asking you if you would like to apply the indicator to all of the students, or just to Nick. When you select to apply to just one student, the system will automatically duplicate the observation so that each student will have their own score. This will also happen if you edit the caption, so that way you can provide different information for both of them.

When you go back to the Dashboard, you will see that Nick has a score for that item, and Sean does not. To apply a score to Sean, start by selecting Sean and follow the same steps.
Comments
0 comments
Please sign in to leave a comment.